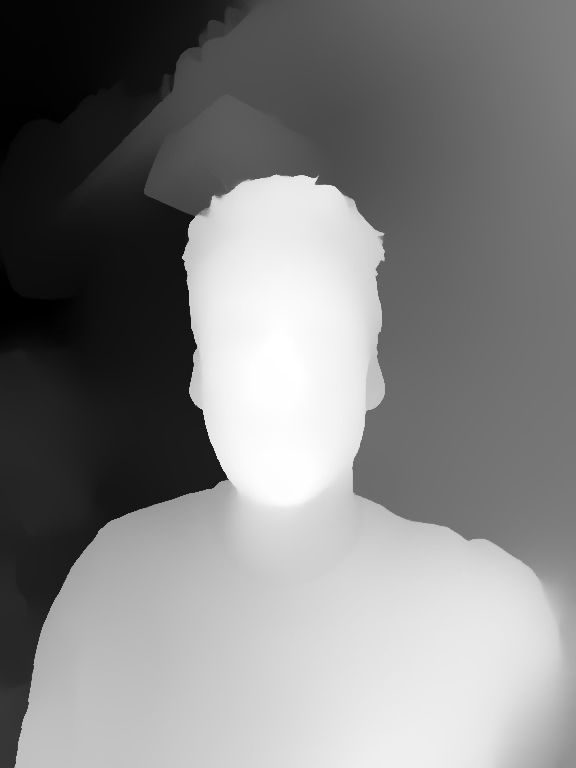
You know how iPhones do this fake depth of field effect where they blur the background? Did you know that the depth information used to do that effect is stored in the file?
# pip install pillow pillow-heif pypcd4

from PIL import Image, ImageFilter
from pillow_heif import HeifImagePlugin

d = Path("wherever")

img = Image.open(d / "test_image.heic")

img = Image.open(d / "test_image.heic")

depth_im = img.info["depth_images"][0]
pil_depth_im = depth_im.to_pillow()
pil_depth_im.save(d / "depth.png")
depth_array = np.asarray(depth_im)

rgb_rescaled = img.resize(depth_array.shape[::-1])
rgb_rescaled.save(d / "rgb.png")
rgb_array = np.asarray(rgb_rescaled)

print(pil_depth_im.info["metadata"])
print(f"{depth_array.shape = }, {rgb_array.shape = }")


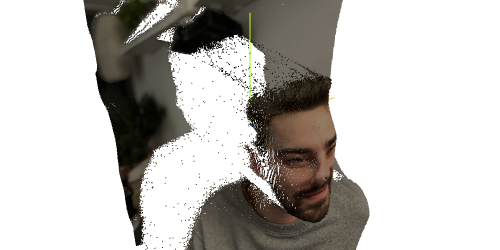
Crazy! I had a play with projecting this into 3D to see what it would look like. I was too lazy to look deeply into how this should be interpreted geometrically, so initially I just pretended the image was taken from infinitely far away and then eyeballed the units. The fact that this looks at all reasonable makes me wonder if the depths are somehow reprojected to match that assumption. Otherwise you’d need to also know the properties of the lense that was used to take the photo.
This handy pypcd4 python library made outputting the data quite easy and three.js has a module for displaying point cloud data. You can see that why writing numpy code I tend to scatter print(f"{array.shape = }, {array.dtype = }") liberally throughout, it just makes keeping track of those arrays so much easier.
from pypcd4 import PointCloud

n, m = rgb_array.shape[:2]
aspect = n / m

x = np.linspace(0,2 * aspect,n)
y = np.linspace(0,2,m)

rgb_points = rgb_array.reshape(-1, 3)
print(f"{rgb_points.shape = }, {rgb_points.dtype = }")

rgb_packed = PointCloud.encode_rgb(rgb_points).reshape(-1, 1)
print(f"{rgb_packed.shape = }, {rgb_packed.dtype = }")

mesh = np.array(np.meshgrid(x, y, indexing='ij'))

xy_points = mesh.reshape(2,-1).T
print(f"{xy_points.shape = }")

z = depth_array.reshape(-1, 1).astype(np.float64) / 255.0

m = pil_depth_im.info["metadata"]
range = m["d_max"] - m["d_min"]
z = range * z + m["d_min"]

print(f"{xyz_points.shape = }")
xyz_rgb_points = np.concatenate([xy_points, z, rgb_packed], axis = -1)

pc = PointCloud.from_xyzrgb_points(xyz_rgb_points)
pc.save(d / "pointcloud.pcd")
Click and drag to spin me around. It didn’t really capture my nose very well, I guess this is more a foreground/background kinda thing.

Update
After looking a bit more into this, I found the Apple docs on capturing depth information which explains that for phones with two or more front cameras, they use the difference in the two images to estimate depth, while the front facing camera on modern phones has an IR camera that uses a grid of dots to estimate true depth like the good old kinect sensor.
So I had a go with the front facing camera too:


The depth information, while lower resolution, is much better. My nose really pops in this one!

