My first exposures to programming as a kid were through processing and arduino.
After a while as a kid playing with Arduino, I started to understand from forum posts and other places the magical truth: Arduino is is just C with some libraries and a easy to setup dev environment! I started to read the datasheets of things like the ATmega328, I guess this way my version of the minicomputers that the generations before mine cut their teeth on.
The atmega328 is a relatively simple computer and you can just about read and understand the datasheet in a reasonable amount of time. It has all sorts of hardware that you can configure, timers that you can set up to count up/down, to trigger interupts, toggle pins etc. I had loads of fun with this as a nerdy kid.
However the compile and upload time is kinda long, C that hits registers directly is both ugly and hard to debug and when you start to work with bigger systems like the ESP32 and RP2040 that have WiFi and multiple cores and stuff this all starts to get a bit less fun, at least for me.
But because the likes of the ESP32 and the RP2040 are so much more powerful they can run a python interpreter and it’s surprisingly fast and really fun!
Everyone loves to hate on python for being slow, and obviously don’t write your tight loops in it (or do, I can’t tell you what to do). But even on a resource constrained microprocessor you can have a fun time with python!
So anyway, here is a compendium of things I’ve being doing with micropython. Some of this is so that I don’t forget how to do it later so there’s a little more detail than might be warranted.
Get yourself a dev board
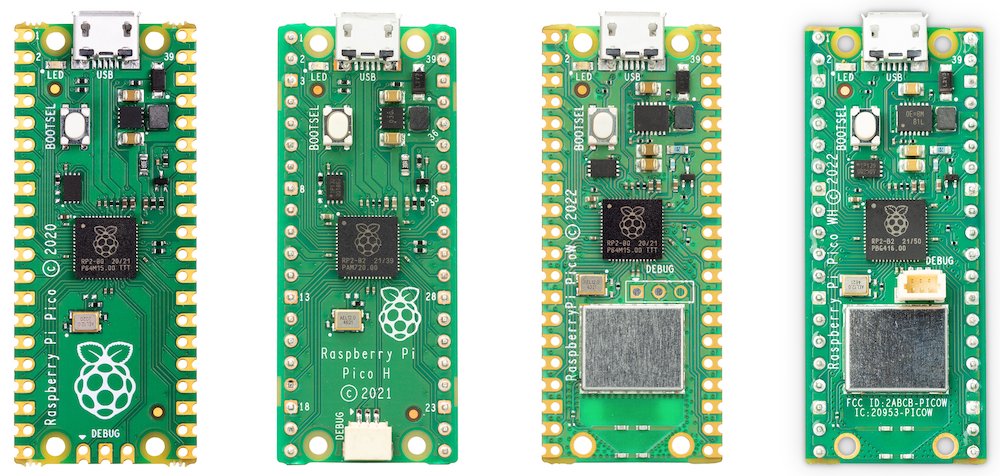
The Raspberry Pi Pico (The offical dev board for the RP2040 micro-controller) is really nice, if you went to EMFcamp you can use the badge, and ESP32 based boards work really well too! The easiest way to start is to flash a prebuilt firmware.
For RP2040 boards that means putting the board in boot mode (by holding the BOOT button and powering it up) and then dragging and dropping a .uf2 file onto a virtual file system that appears.
Run some code!
mpremote is a really handy little tool for interacting with a micropython board. My first scripts to play with this looked like this
mpremote cp main.py :main.py
mpremote run main.py
You can also go straight to a REPL:
mpremote REPL
Next Steps
In the next few posts I’ll talk a little about:
- Drawing graphics
- Using nice fonts
- Compiling your own custom micropython firmware builds and when that makes sense.
- Compiling you firmware to webassmebly so you can make a web based simulator.
- Debugging the RP2040 with the RP Debbug probe.
- Using the DMA hardware on the RP240 to offload work from the main CPU
- Async programming with micropython
Here’s a little webassembly simulator of the micropython project I’ve been working on. I’ll expand on this in later posts but very quickly:
- It’s targeted at a 240x240 pixel circular display that stores RGB colors with 5, 6 and 5 bits for each channel, respectively.
- This is running under webasembly with some custom code to convert the RGB 565 data and display it in a
<canvas>tag - I’m using a ttf font called gunship converted to bitmap format and frozen into the firmware.