Welcome to the guide for the workshop Build your own Sensor.Community air quality monitoring station!
See an issue on this page? Open a PR!
Obligatory Spiel
Air pollution is a major public health issue but you’d be surprised how few official monitoring stations there are in Europe. That’s an issue because pollution levels can vary a lot, even from one street to the next!
To get the best picture possible we need more sensors which is where citizen lead projects like Sensor.Community are having a lot of success!
In this workshop you’ll put together an air quality monitor made from an esp8266 and a few sensors, load up the Sensor.Community firmware and connect it to their network so that other people, scientists and policy makers can see where the problems are and hopefully change something. It will also contribute to this cool interactive map. We’ll discuss options for weather proofing, where to place the sensor and how to hook it into your own smart home setup if you have one.
The Kits
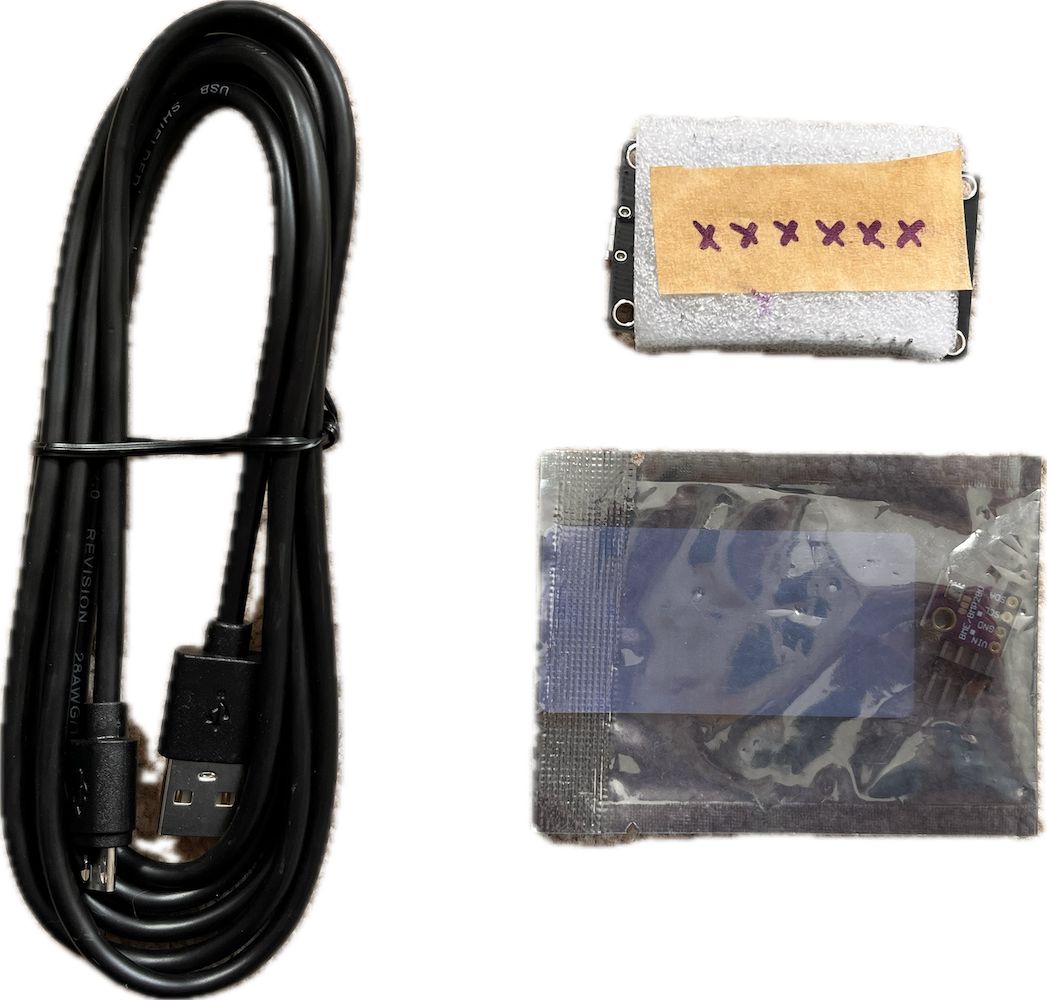
The base kit (£15) contains:
- An esp8266 Dev board pre-flashed with the firmware
- A BME280 Pressure/Temperature/Humidity sensor
- A 2m micro USB cable
- A long F-F header cable (dupont) with 4 wires
- A USB power supply is not included, let’s try to prevent some e-waste by reusing an old one!
- There will be a pack of zip ties lying around somewhere that you can grab from
The base+addon kit (£40) also contains:
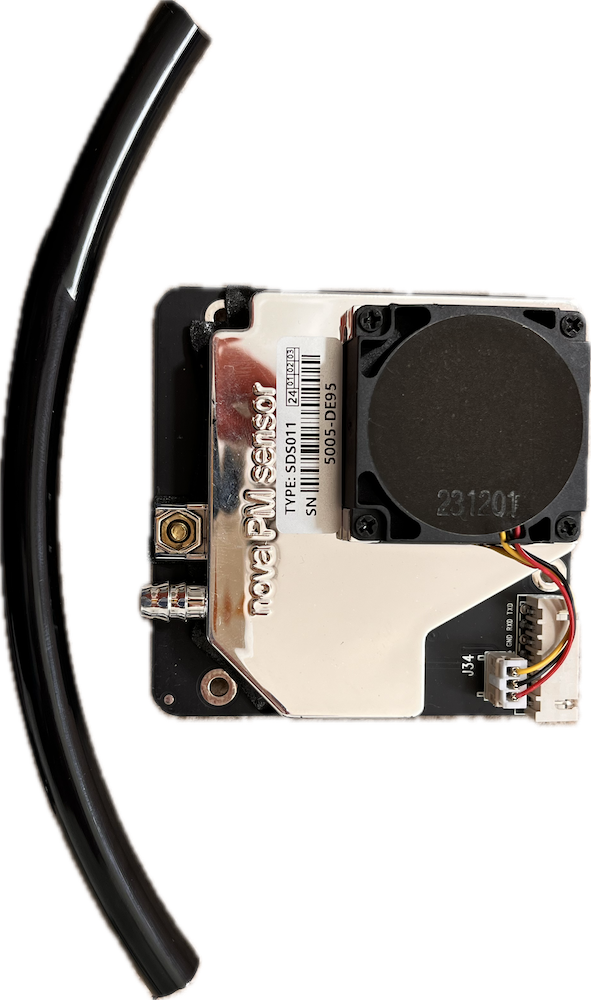
- An SDS011 particulate matter sensor (PM2.5-10)
- A length of black plastic tube to separate the intake of the sensor a bit from the exhaust
- A short header cable with 4 pairs
In the workshop
- Come buy a kit from me, either exact change or contactless.
- Assemble it
- Configure it
Assembly
Attach the black plastic tube to the port on the SDS011.
If your BME280 is unsoldered, solder the 4 pin header on now. If you can’t find a soldering iron, you can always skip this step for now and do it later, the kit will still work with just the SDS011 or even no sensors attached.
Each esp8266 has a unique chipID, similar to a MAC address. When I flashed the firmware I noted down the chipID on a piece of tape on the back of each board, you need this id for a couple steps in a minute so don’t lose it! If you do, you can use the firmware flasher to find it again. There are links to the firmware flasher binaries on the official guide.
Connect the headers up using the wiring diagram below, use the longer headers for the BME280 and the shorter ones for the SDS011.
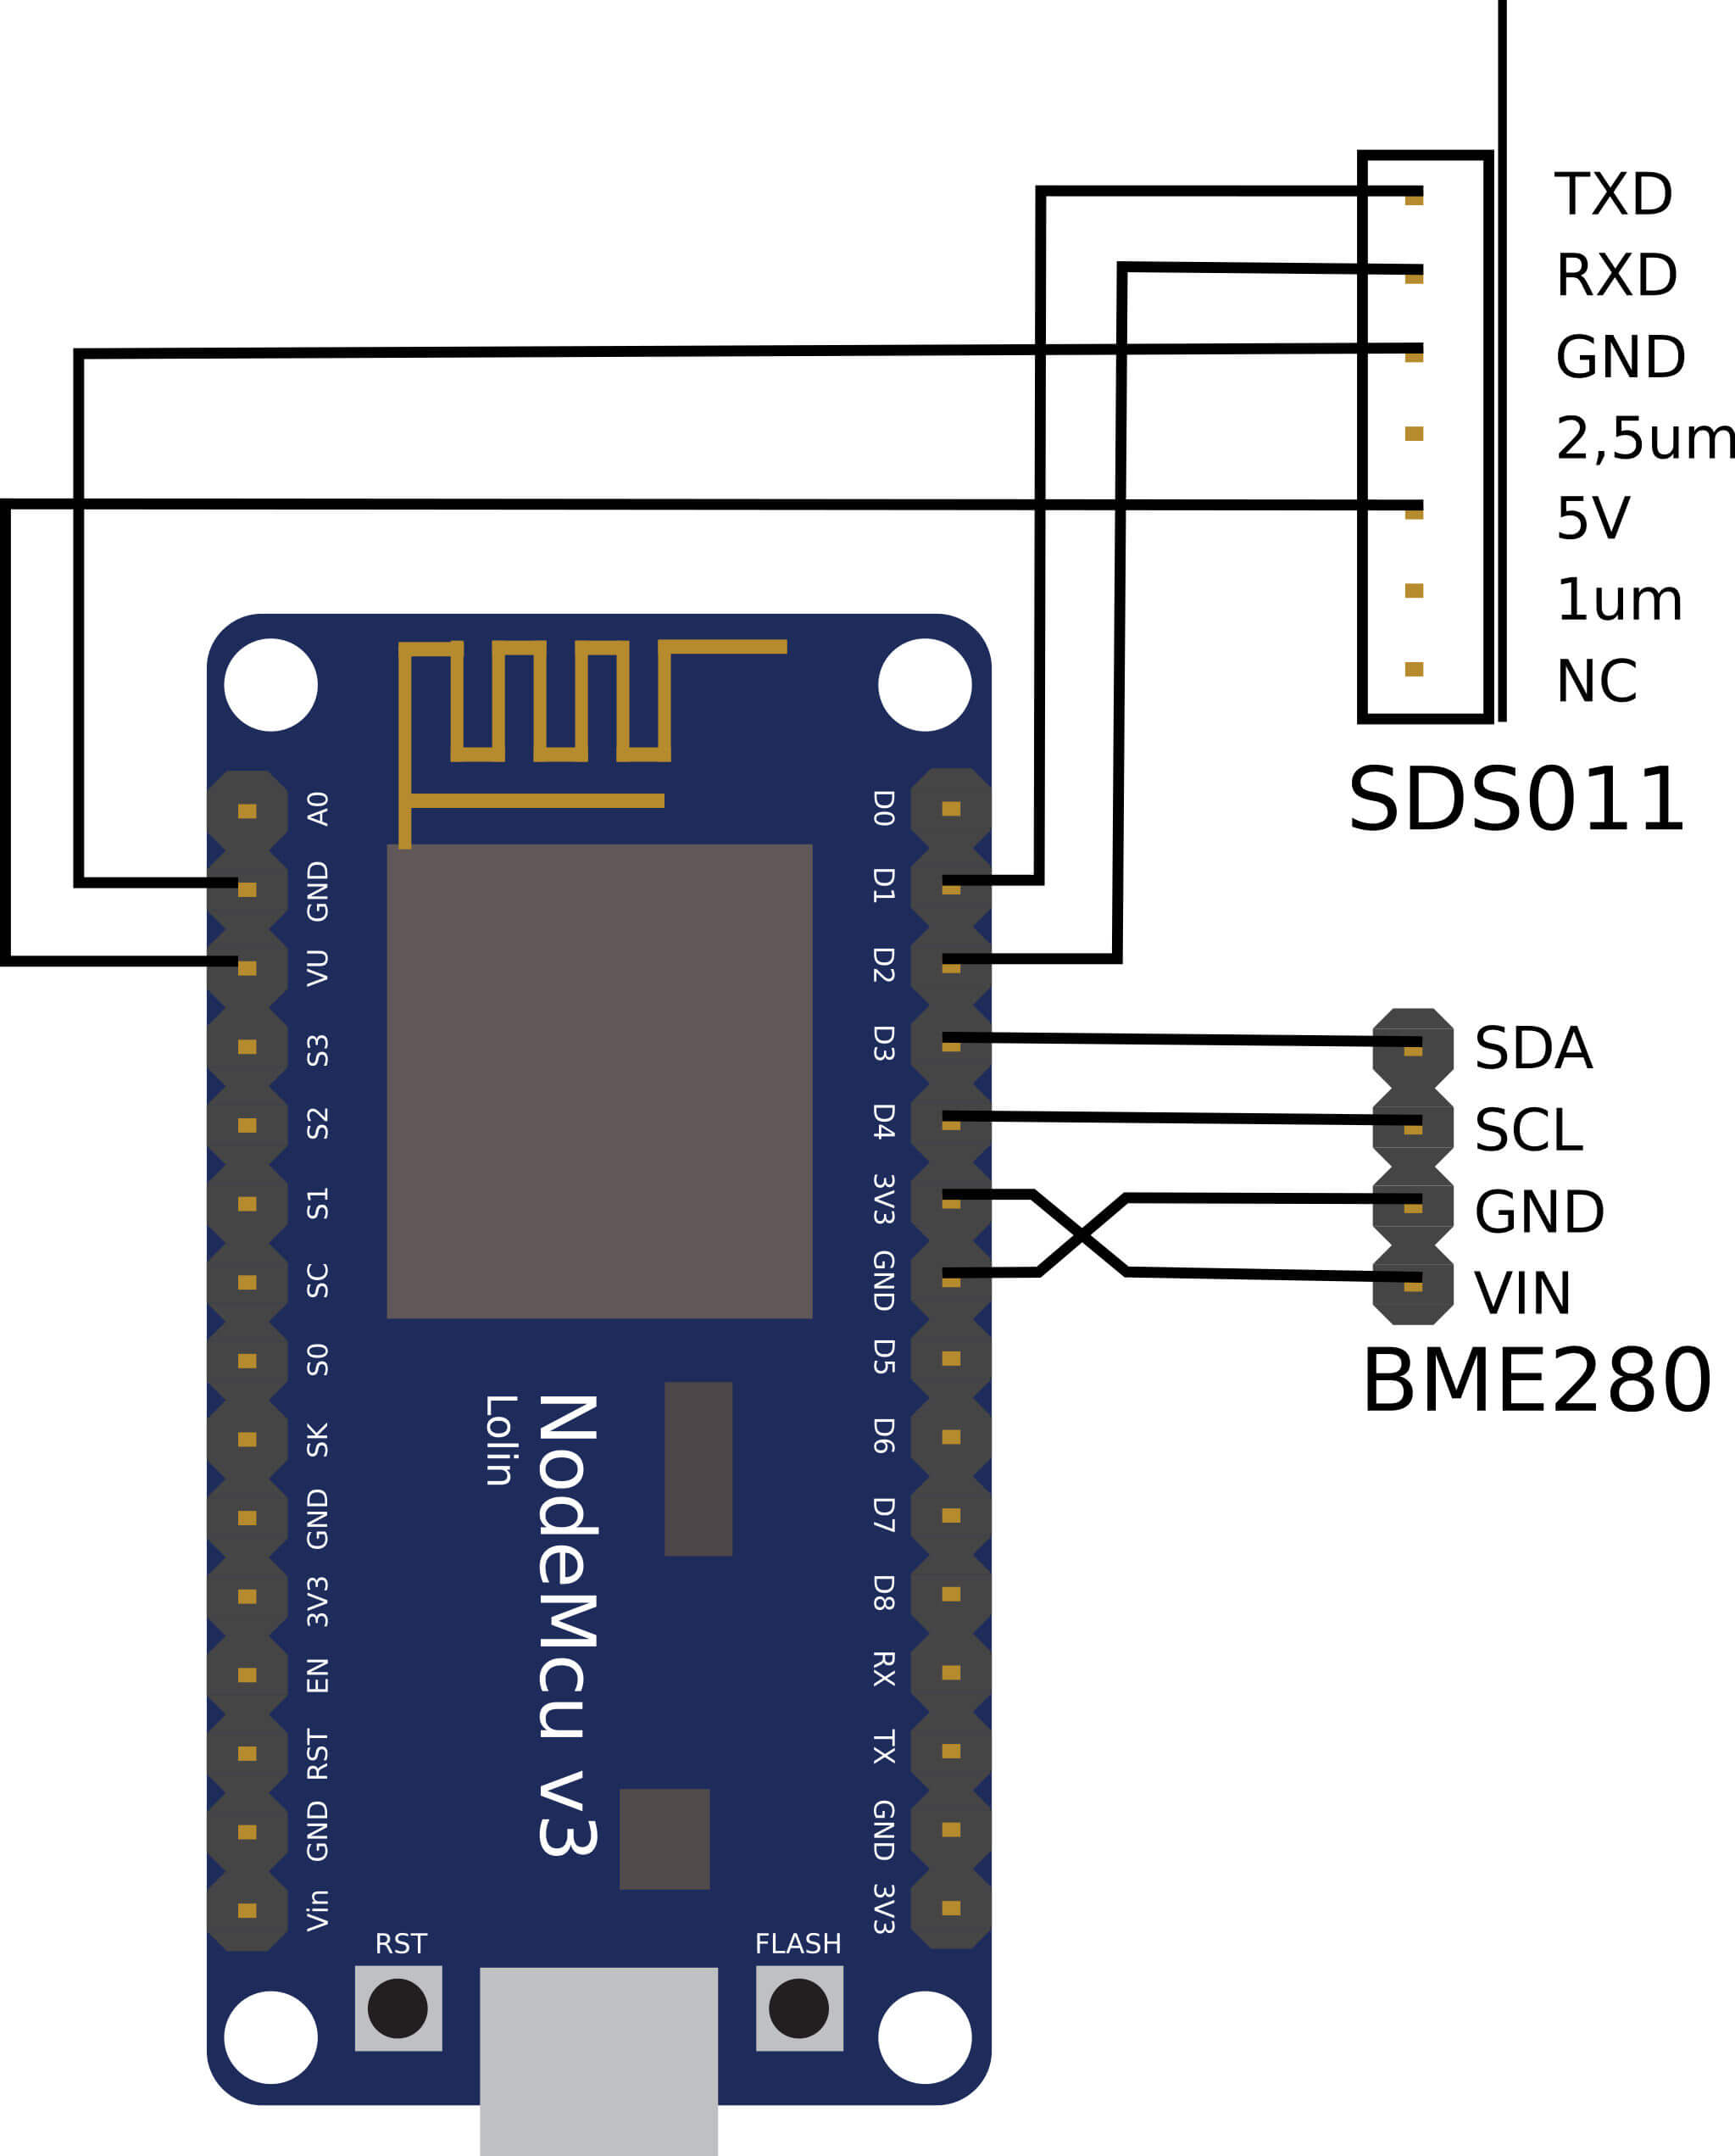
WARNING Be careful with the pin connections here! Accidentally swapping 5v/VIN and GND can destroy components. On the SDS011 one of the pins is labelled TXD, use this to orient yourself and double check all the wiring before plugging it in for the first time. If you smell a weird smell, unplug the power and triple check your wiring!
We want the input of the SDS011 tube to be close to the BME280, hence the different cables. Don’t worry about this too much now, but try to do this when you install it into a permanent position.

Done! If you were doing this at home, you would have also needed to install the firmware but I did that step for you to save time in the workshop.
Now plug the sensor in. When it starts up, the firmware searches for any configured wifi networks it knows about, which initially is none. When it doesn’t find one it starts up a hotspot called “airRohr-{ChipID}” with password “airrohrcfg”.
Once you see the “airRohr-{Your ChipID} network you’re done and can move onto the configuration. There is a chance that 30 wifi hotspots all starting up in the same location might cause some issues so be patient if you don’t immediately see the new network.
Configuration
Connect to this network on a device, it will likely open the config page in a captive portal for you but if it doesn’t (depends on the device) go to 192.168.4.1.
While you’re at EMF, let’s connect the sensor to the emfcamp wifi SSID: emf2gc024-open.
In the More settings tab you can change the interval at which measurements are taken. For radio spectrum politeness at EMF it would also be good to shorten the “Duration router mode”, this reduces how long the sensor broadcasts a hotpot for if it can’t find a network.
In “sensors” you can configure which sensors are connected, which for this workshop will be one of SDS011 and BME280 or both.
EDIT: This section longer works as of October 2024, the grafana link now requires authentication.
Next, you can check if sensor.community is receiving data from your board even before it is registered. Go to “https://api-rrd.madavi.de/grafana/d/GUaL5aZMz/pm-sensors?orgId=1&var-chipID=esp8266-{your ChipID}”. You should see some wifi signal strength data if your board is successfully sending data to Sensor.Community, even if it’s not registered. This may take a few minutes to happen. If you don’t see any data, first wait a few minutes then double check your chipID is right. I have misread at least one in the past. You can use the firmware flasher to do this.
Another useful way to check if your board is working is to connect it to your laptop over usb and check the serial output, the baudrate is 9600. The easiest program to use is the serial monitor included in arduino but you can also use screen or minicom.
Registering with Sensor.Community
Whether you intend to run the sensor out of your tent or village at the EMF (which I encourage!) or wait until you get home to install it in a more permanent location, the next step is registration. You’ll need to provide some details about the location of the sensor so wait until you’ve installed it in somewhere, at least semi-permanently.
Go to devices.sensor.community and start by making an account. Once you receive the email you confirm your account and can go ahead with registering the sensor.
Where it asks for “Sensor ID” that’s your board’s chipId, in the end your device will be identified by a string like “esp8266-{chipId}”.
While you’re at EMF it might be nice to tick “Publish exact location” so that the sensor data is high resolution enough that we can map the site. However when you install it at home you may consider turning this off again.
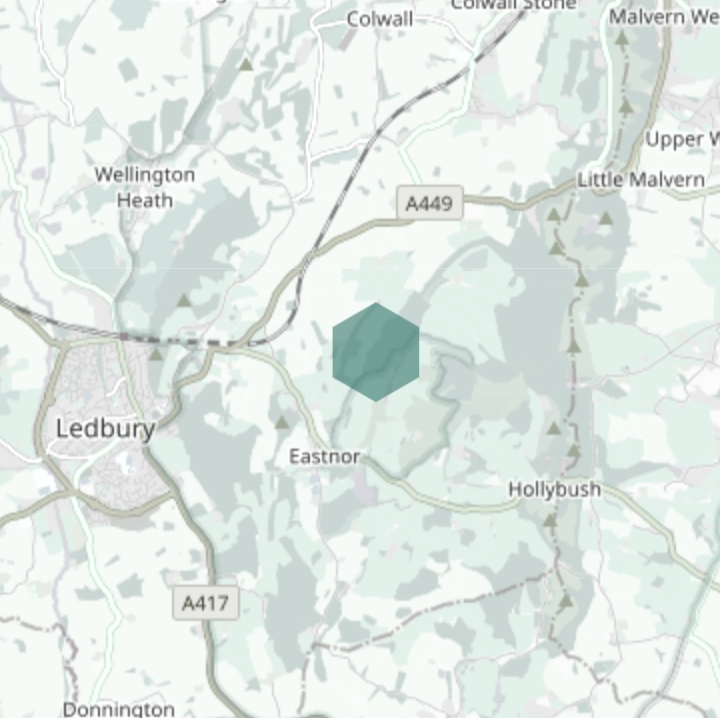
For installation at EMF you can use the offical map to get accurate (lat,lon) coordinates for the sensor by right clicking.
Change the sensors to “SDS011” and “BME280”.
Once you’ve registerd the sensor, its the data will start appearing on the map!. From your devices dashboard there’s a data link, for the sensor I set up this morning it looks like this.
Recap
So at this point you (and/or I) have:
- Physically assembled the sensor
- Flashed the firmware onto the esp8266*
- Written down your ChipId for later
- Logged onto the airRohr-{Your ChipID} hotspot and configured the sensor
- Registered your sensor with the Sensor.Community project.
* If you’re in a workshop I likely did this step for you.
If you have gotten stuck with any of these steps head to the troubleshooting section for some suggestions.
After the workshop
Find a proper location for the sensor. This could be your home but you can also get creative and ask local schools or the like if they would like a sensor installed.
Practically, you’ll need some weather proofing and a 5V power source. It’s recommended to place the sensor 1-3m above ground level in a well ventilated outdoor area. Basically you’re trying to measure the same air we’re all breathing.
Options for weather proofing:
- Use a U bend piece of drain pipe as recommended by the project
- Browse some of the many 3D printed case designs online
Congratulations! You’re now a part of a global network contributing to fighting air pollution!
Troubleshooting
If you’re in a workshop, come find me or one of the helpers!
You can get useful debug output from the sensor by connecting to your laptop and opening the serial terminal with baudrate 9600. The arduino IDE is an easy way to do that but you can also use terminal commands like screen, minicom or cu. Sparkfun has a good guide on this.
No Hotspot
If you can’t see the airRohr-{Your ChipID} hotspot it means one of three things:
- Your esp8266 started a hotspot for 10 minutes after it got power but it’s been on longer than that so it turned it off again.
- Your esp8266 successfully connected to your wifi network.
- Your esp8266 is broken or has no firmware
Eliminate 1 as a possibility by power cycling the board.
You can check 2 either by opening “http://airRohr-{Your ChipID}.local” in your browser while connected to your home wifi or looking at the serial output.
If you think the problem might be 3, try reflashing the esp8266 firmware. If that doesn’t help, maybe your 5v power supply is a little weak or your micro usb cable has a high resistance, swap them both out to eliminate that as a possible issue.
Failing all of the above you might have have to replace the esp8266. Definitely check the serial output first if you can, that always helps to see what’s going on.
Won’t connect to the wifi
I.e the hotspot does not disappear after configuration.
Try a different network if you can, the firmware doesn’t support anything fancy like username/passwords or WPA3. Connecting to a phone hotspot is a good test to see if your other wifi might be the problem.
I have had an issue with the board just stubbornly refusing to connect to a wifi network that it really should be compatible with. For reasons I don’t understand a firmware reflash fixed this, so you can always try that too, it can’t hurt.
### Data not flowing after registration Your board connected to your wifi and you registered it but now the data doesn’t seem to be showing up on the Sensor.community site.
First, wait at least 5 minutes.
Next, double check your chipID is right, in the workshop I had misread at least 1 of the 30 kits we set up.
If you realise your registered chipID if wrong, make a new device with the right chipID and email tech@sensor.community letting them know to release the incorrect chipID that your registered so that if anyone else has that id they won’t get the dreaded “Sensor ID is already registered”, it’s not enough to just delete it in the interface.
### Sensor ID is already registered See here.